|
|
|
|
Heart Shaped Elephant
This tutorial was created December 29th, 2001 ©TCreations 2001 This creation is my own. Anything similar is purely coincidental. Please do not copy any part of this tutorial or place it anywhere without written permission from me. Property of TCreations
I was inspired to create this tutorial after seeing some valentines in a magazine, and thought that they could easily be created in Paint Shop Pro. There are no outside filters or plugins needed for this tutorial. Everything you need is right in PSP. This tutorial was done in PSP version 7.04 and assumes you have a working knowledge of PSP. Tools needed for this tutorial are as follows: JASC Paint Shop Pro
Get a 30 day
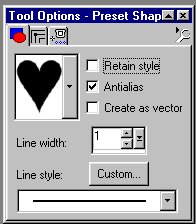
free trial here Step 1. Open a new image 400x400, transparent. Set your foreground to black and your backround to gray #808080. Step 2. Select your preset shapes tool and use these settings;
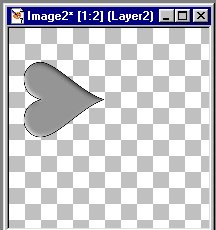
Step 3. Add a layer by going to Layer> New Raster layer. Name it "Ear". Step 4. Draw a heart on your canvas. Step 5. Go to Effects> 3-D Effects> Inner Bevel and apply the "Pillow" except change the intensity to 84.
Step 6. Go to Image> Rotate and rotate it to the left 90 degrees. Step 7. Go to Effects> Sharpen> Sharpen. Step 8. Move the elephant's ear to the left of your canvas.
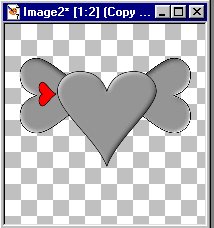
Step 9. Open your layer pallet and duplicate the ear layer by right clicking on the layer and choosing duplicate. Step 10. Go to Image> Mirror. Then go to Effects> Sharpen> Sharpen. Step 11. Add a new layer and name it "Head". Select your preset shapes tool again and using the same settings, make another heart. This time make it slightly larger than the ears. Move it in place like I have mine.
Step 12. Apply the same Inner Bevel as before. Step 13. Go to layers> merge visible. Step 14. Add a new layer. Layer> new raster layer and name it "inside ear". Change Backround to red #FF0000. Step 15. Select your preset shapes tool and with the same settings, draw a small heart inside the left ear. Step 16. Go to Image> Rotate and rotate to the left 90 degrees. Sharpen your image by going to Effects> Sharpen> Sharpen. Step 17. With your mover tool, move the inside ear into place like mine.
Step 18. Apply the same inner bevel as before. Step 19. Open your layer pallet and duplicate your "inside ear" layer. Go to Image> Mirror. Move into place to match the other side. On to the finishing touches. |