|
|
|
|
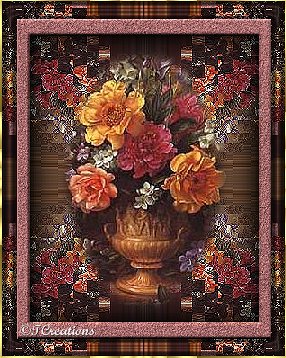
Emission Mirror Frame
This tutorial was created May 3, 2002 ©TCreations Property of TCreations
This creation is my own. Anything similar is purely coincidental. Please do not copy any part of this tutorial or place it anywhere without express written permission from me. You may link to this tutorial ONLY. Do not sent it through e-mail! If you would like to use any of my tutorials for group settings or group lessons, please E-Mail me for my conditions. This tutorial was written using JASC PSP version 7.04 and assumes you have a working knowledge of the program at an intermediate level. Tools needed for this tutorial are as follows. JASC Paint Shop Pro. Download a 30 day free trial version or purchase here.
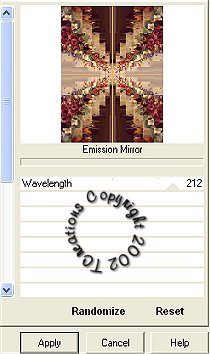
Fun House Filters you can find HERE. Fun House plugins need to be converted to Pico (plugin commander). You can get the information you need at the same site as the plugin. Another very useful place to check out is Renee's Pico Tips located Here. A Image of choice. ( A graphic with a focal point that is centered would be your best bet) Let's get started! Step 1. Open your image in PSP, and duplicate your image by going to windows> duplicate. Now you can close the original. The reason for this is if I want to use that same image again, I will be able to. Duplicate your image again. Minimize one, we will be using it later. Depending on the size of your image, you might want to resize it now to no bigger than 350 pixels on the longest side. Step 2. Activate one of your images. Go to effects> plugins> Fun House> Emission Mirror and apply using these settings. I use Filters Unlimited so your screen might look different.
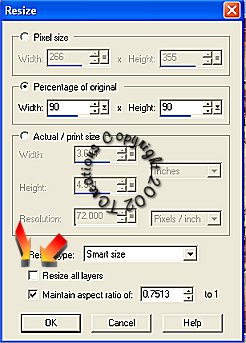
Step 3. Go to layers> promote to layer. Now go to image> resize and resize your image by 90% making sure "Resize all layers" is UNCHECKED. Sharpen your image by going to Image> sharpen> sharpen.
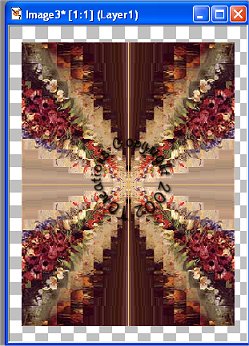
This is what we should have now.
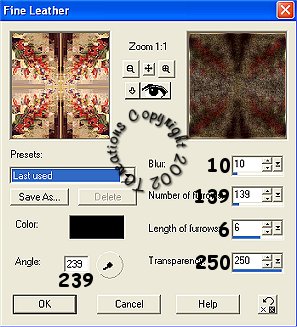
Step 4. With your magic wand, select your border. Grab your eyedropper tool and choose a color from your graphic. Flood fill the selection with that color. Step 5. Go to effects> texture effects> fine leather and apply using these settings.
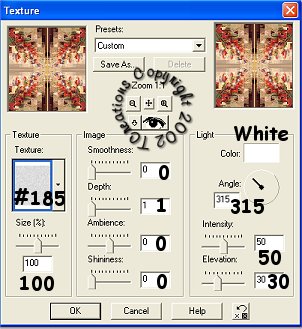
Step 6. Now go to effects> texture effects> texture and apply using these settings. ( In my texture folder it says # 185. It might be different in your folder. Really any texture will do. This is YOU'RE creation after all.) *Winks*
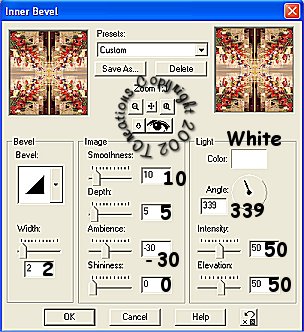
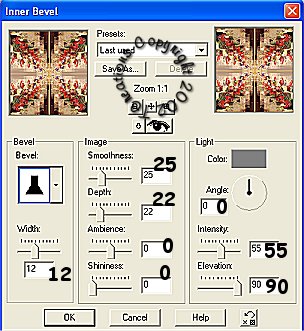
Step 7. Now we are going to add a inner bevel using these settings.
Step 8. Go to selections> invert then to selections> float. Now go to effects> 3 D effects> cutout and apply using these settings.
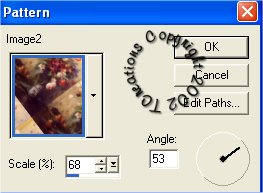
Apply the same cutout again only this time change the Horizontal & Vertical to 4. Deselect. Step 9. Go to Image> resize and resize your image the same as before. 90% and make sure "resize all layers" is UNCHECKED. Sharpen your image by going to Effects> sharpen> sharpen. Step 10. With your magic wand, select your border. Change your foreground to patterns, and find your duplicated image towards the top of your patterns. Use these settings.
Fill your border with your pattern. ( Do not close out your duplicated image. We are not done with it yet) Keep selected. Go back to your Fun House Emission Mirror filter and apply using the same settings as before. Step 11. Now we are going to add a inner bevel using these settings. Deselect after applying your inner bevel.
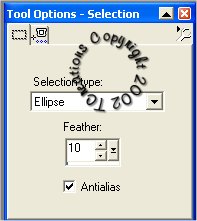
Step 12. Activate your duplicated image. Grab your selection tool and use these settings.
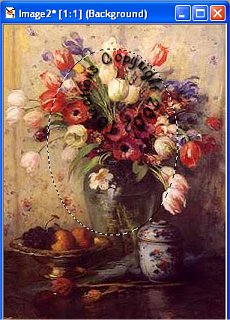
Select the center portion of your graphic.
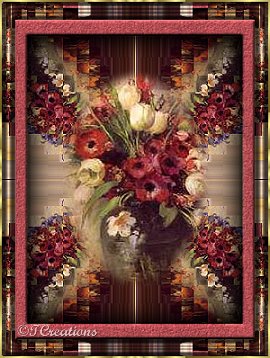
Go to edit> copy. Activate your original image. Paste> as new layer. With your mover tool, center it on your graphic.When you are satisfied, merge your layers visible. Step 13. If you want to add a small border to finish it off, go to image> add borders, and add a border of 2. Flood fill with a gold pattern. You're done! here another I did.
I hope you have enjoyed this tutorial. If you have any questions, feel free to E-mail me anytime.
These tutorials and their contents are property of TCreations and are copyrighted by law. Do not place any part of these tutorials anywhere without my permission. You may link to them ONLY. Do not remove any of the graphics, zip files or HTML within these pages to reproduce these tutorials, without my express written permission. DO NOT send any portion of this tutorial through E-mail. The Image you create from this tutorial is yours to do with what you want. If you would like to use any of my tutorials for group settings or group lessons, please E-Mail me for my conditions. ©TCreations 2001 All Rights Reserved. The backgrounds on this site were created by me exclusively for TCreations and may not be used without my permission. Property of TCreations
|