|
|
|
|
How I Make Tags
This tutorial was created June 18th 2002 ©TCreations Property of TCreations
This creation is my own. Anything similar is purely coincidental. Please do not copy any part of this tutorial or place it anywhere without express written permission from me. You may link to this tutorial ONLY. Do not sent it through e-mail! If you would like to use any of my tutorials for group settings or group lessons, please E-Mail me for my conditions. This tutorial was written using JASC PSP version 7.04 and assumes you have a working knowledge of the program at an intermediate level. *I have had several people ask me how I make my tags. I learned how by doing several tutorials and then adapting my own "style". This tutorial is a combination of what I have learned and what I have taught myself along the way. It's very easy and addicting once you get the hang of it* Tools needed for this tutorial are as follows. JASC Paint Shop Pro. Download a 30 day free trial version or purchase here.
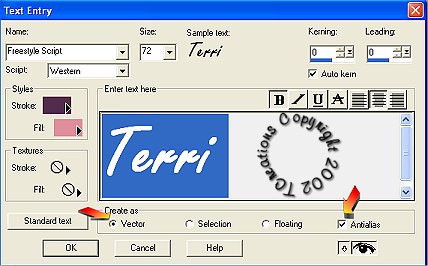
A tube of choice. Step 1. Open a image 400x400, transparent. I like room to work. Your finished tag will not be this big unless you want it to be. Step 2. Find the tube you want to use for your tag and with your color picker, pick 2 colors from your tube. One dark, make that your foreground color, and one lighter, make that your background color. Step 3. With your text tool, click on your canvas to open your text box. Find the font you want to use for your tag. I have found that certain fonts look better with certain images. You just have to play around and test a few. The size of your font also depends on you. Sometimes a font set at 48 size is bigger than another font set at that same size. For this tutorial, this is the font and size I used.
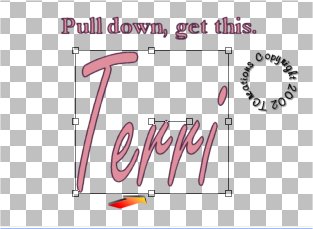
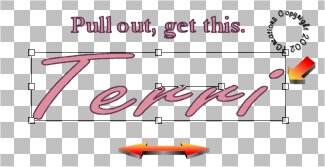
Make sure vector AND antialias is checked. Step 4. Once you have found your font, and determined what size it should be, click okay. You will see your Name on your canvas with a box around it. If you want to change the size of your font after you have clicked ok, you can do that by putting your cursor over one of the little boxes that surround the bigger box. Once you see a up and down arrow, click your mouse and pull down, or up or to the side depending on what little node you are on. Here are some examples.
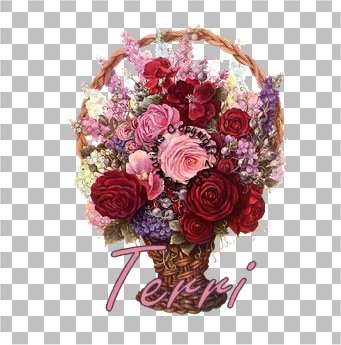
Step 5. Now that you have decided on the size of your name, go to layers> convert to raster layer. Now go to Layers> new raster layer. Step 6. Open your tube, and scale it down to the desired size. Apply your tube to your canvas. If you scaled down your tube, remember to go to Effects> sharpen> sharpen. Step 7. Open up your layer pallet and drop your tube layer below layer 2. With your mover tool, move your tube into place. Do the same with your name. It can be anywhere you want, just make sure you can see it clearly if you overlap it on the tube.
Step 8. Now go to layers> merge> FLATTEN. With your wand, antialias checked, tolerance set to zero, click on the white background to select. Make sure you select ALL the white. In the middle of your letters, On your tube. Example below.
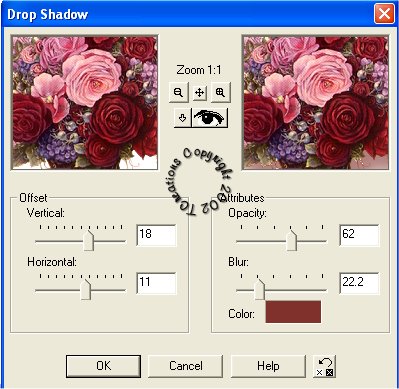
If you are selecting more than one spot with your wand, make sure you hold down the shift key as you are selecting. Step 9. Go to selections> invert, then to selections> modify> and contract by 1. Go to effects> drop shadow and use these settings.
The shadow color should be the darker color from your tube. Deselect. Watermark your image. I always add a new layer when I watermark my images so I can move it around if I want. Merge visible. Step 10. Now if you want to make your tag smaller, you can crop the excess white. With your selection tool set at rectangle, select just your image INCLUDING ALL the shadow. Crop to selection. You're done!
I hope you have enjoyed this tutorial. If you have any questions, feel free to E-mail me anytime.
This great award is given to the members in Dynasty that write a tutorial in the month of June. Thank you Patti, Suecat & Patao for this! I love it!
These tutorials and their contents are property of TCreations and are copyrighted by law. Do not place any part of these tutorials anywhere without my permission. You may link to them ONLY. Do not remove any of the graphics, zip files or HTML within these pages to reproduce these tutorials, without my express written permission. DO NOT send any portion of this tutorial through E-mail. The Image you create from this tutorial is yours to do with what you want. If you would like to use any of my tutorials for group settings or group lessons, please E-Mail me for my conditions. ©TCreations 2001 All Rights Reserved. The backgrounds on this site were created by me exclusively for TCreations and may not be used without my permission. Property of TCreations
|