|
|
|
|
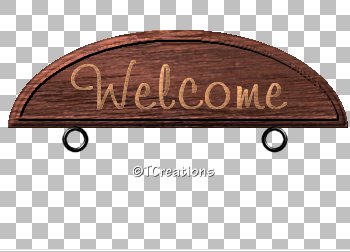
Welcome Sign
This tutorial was created March 1, 2002 ©TCreations Property Of TCreations
This creation is my own. Anything similar is purely coincidental. Please do not copy any part of this tutorial or place it anywhere without express written permission from me. If you would like to use any of my tutorials for group settings or group lessons, please E-Mail me. This tutorial was written using JASC PSP version 7.04 and assumes you have a working knowledge of the program at an intermediate level.
Tools needed for this tutorial are as follows.
JASC PSP 30 day
trial version you can download here. This wood pattern. Right click & save to your own hard drive.
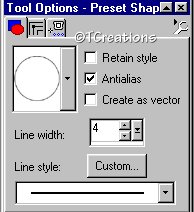
My friend Patao has alot of wonderful wood tile fills in different colors at her site for you to choose from. You can find them HERE. Step 1. Open a new image 350x250, transparent. Add a new layer by going to Layers> new raster layer. Step 2. Select your preset shapes tool with these settings.
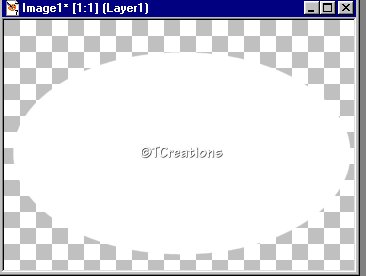
Step 3. Change your background to white and your foreground to null. Draw a oval on your canvas. Try to cover most of your canvas. My coordinates started out at 9,32 and ended with 337,202. To see this look at the bottom left hand corner of PSP.
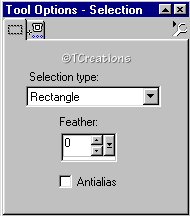
Step 4. Click on your selection tool with these settings.
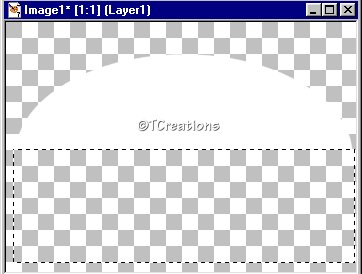
We are going to cut off the bottom half of our oval. Starting on the left, in the middle, select the bottom of your oval. Hit the delete button on your keyboard. Deselect.
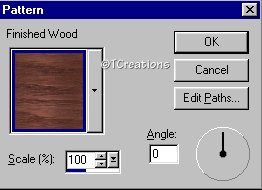
Step 5. With your magic wand, click inside the white area of your cut off oval. Go to selections> modify> expand by 1. Set your foreground to pattern and choose Finished wood with these settings. Flood fill the selected area.
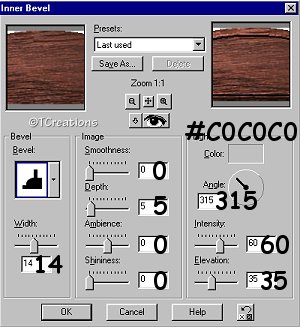
Step 6. Now go to Effects> inner bevel, and apply using these settings.
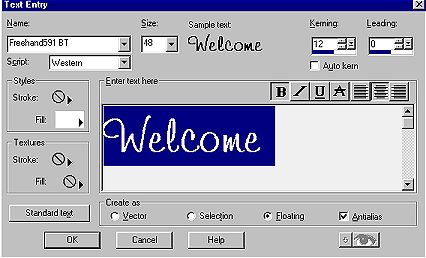
Step 7. Set your foreground to white. Select your text tool With these settings. I used the Freehand591 BT font, but you can use whatever font you like. Type in "Welcome" and click okay.
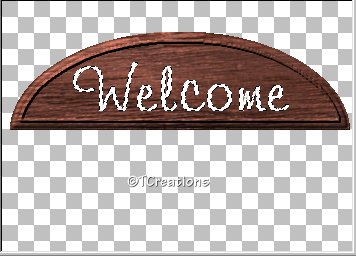
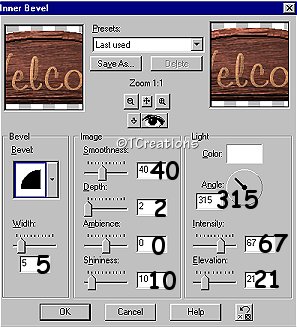
Step 7. Open up your "Lightwood" in PSP. Set your foreground to pattern, and find your lightwood. It should be at the top. Flood fill your text. Step 8. Add a inner bevel using these settings. Deselect.
Step 9. Add a new layer. Select your preset shapes tool again. Make sure your foreground is set to black and your background is set to NULL. Use these settings.
Step 10. Draw a chain link right underneath where the "W" starts. Add a inner bevel using the "Round" preset. Deselect. Now go to your layer pallet and duplicate your link layer. Go to Image> Mirror. Now you should have the exact same link on the opposite side of your sign.
Lets go to Page 2 to finish our sign.
|